Fuel your next big win with the power of double confirmation: Know when and where to enter

You’ve seen the strongest zones through your Supply Demand PRO. Now master the timing with the new Scientific Scalper.

Table of Contents

1. Scientific Scalper indicator: The perfect match for Supply Demand Pro

You already have the Supply Demand Pro indicator in your hands, which means you’ve got a clear blueprint. You know exactly where the market is likely ro reverse and where to trade.

But here’s the question: Do you know exactly when to pull the trigger?

Sure, the Supply Demand Pro gives you alerts to seize those opportunities. But I want you to understand that timing is very important.

Enter just a few seconds too late… and you could miss the best part of the move. Enter too early… and you might get stopped out before the big move begins.

That’s why Scientific Scalper was developed. It becomes a perfect complement to the Supply Demand Pro, helping you enter your trades with pinpoint accuracy.

So why this indicator? Why does it work so well with your existing setup?

1.1 The features that make Scientific Scalper so powerful

Scientific Scalper indicator blends advanced technology with a scientific trading approach. It’s not just about generating signals, it’s about helping you understand when a setup actually matters.

Here’s what makes it stand out:

  • Real-time background color filter: Keeps you aligned with the trend, so you trade in the right direction at all times.
  • Multi-factor confirmation: Combines three crucial factors – price action, volume and volatility – to provide reliable alerts.
  • Multi-timeframe friendly: Works seamlessly across intraday setups and beyond. No matter what style of trading you are.
  • Precise and clean buy or sell signals: Tells you when it’s time to pay attention through simple, visual signals.

1.2 What does Scientific Scalper do on your chart?

Powered by our proprietary algorithm, this indicator runs smoothly through a simple yet effective two-step algorithm:

  1. Trend analysis: It detects the underlying trend to ensure you’re trading with momentum, not against it.
  2. Real-time entry alerts: As soon as market conditions shift, it triggers timely buy/sell signals based on confirmed confluence.

Individually, Supply Demand Pro and Scientific Scalper are incredibly effective. But together?

These tools give you complete control over reversal trading.

2. Here’s how the combo works

Step 1: The Supply Demand Pro does the foundational work.

  • It identifies institutional supply and demand zones which are the key price levels where reversals are most likely to occur.
  • These zones are drawn automatically on your chart, giving you a visual roadmap of potential turning points based on price structure.

These are the “where” of your setups.

Step 2: The Scientific Scalper steps in to confirm those entries.

  • It provides trend-based confirmation using background color: blue means bullish trend, and red means bearish trend.
  • It also gives buy or sell signals when the market aligns with the dominant trend.

This is your “when”, knowing exactly when to pull the trigger.
Next, the magic is here.

Step 3: Confirm the signal with zone and color

  • Price enters a demand or supply zone
  • The background color from the Scientific Scalper matches the trade direction
  • A bullish or bearish signal becomes a strong entry confirmation.

Cool? With this pair, you are no longer relying on just a zone or a single signal. You are confirming reversals with both price action and momentum.

Let’s kick it up a notch.

Step 4: Refine your entry with Fibonacci

  • Once the background and alert signal align near a demand or supply zone, apply a Fibonacci retracement to refine your entry point.
  • At that point, the pro tip is to set your stop loss just beyond the zone or Fib level. This minimizes risk while giving your trade enough room to breathe.

Like that:

Scientific Scalper indicator does most of the heavy lifting while Supply Demand Pro helps you see all the newly formed trade setups with just one glance at the chart
0
+
Verified Traders
Trusted to combine Supply Demand Pro with Scientific Scalper for their setups
Want more detailed examples? Check out this video below to see the combo works on the live charts:

3. More precision. More profits.

If the Supply Demand Pro gives you the map, the Scientific Scalper hands you the timing. Together, they eliminate guesswork.

No more chasing trades. No more entering too early or too late.

Instead, you’ll get:

  • Precise entries for high-probability trades
  • Stronger confirmation before entering a position
  • Suggested stop loss and take profit levels
  • More confidence in every trade you place

This combo becomes the perfect upgrade to your zone-based strategy.

And the signals? Clear. No fluff. Buy and sell signals are displayed right inside those key supply and demand areas.

But we are not done yet… Here’s the best part…

Your special offer: $129 for Scientific Scalper (Save $170 off the public price)

Days
Hours
Minutes
Seconds

Now you can grab the Scientific Scalper for only $129 (the public price: $299). That’s $170 in savings, exclusively for Supply Demand Pro users like you.

Why?

Because we want you to get the most out of your toolkit. And this is the final piece that completes your double confirmation combo.

The indicator is ready. The never-seen-before deal is live. The edge is yours.

It’s go time.

Scientific Scalper Indicator

TradingView Platform
$299
$ 129 (Your Exclusive Offer)
  • One-time payment
  • Lifetime license
  • Get Scientific Scalper for Tradingview

Common Questions

After purchasing, you’ll fill out a short form that asks for your Tradingview username. And then, we’ll grant your username access to our indicators within 24 hours.

It works on ALL markets internationally that are available on Tradingview: FX, stocks, indices, commodities, futures, etc…

These indicators work on Tradingview (both computers and mobile devices)

Customer Reviews

Harmonic Flowz - Verified Purchase
Thank you Indicator Vault.
Read More
Many thanks to Indicator Vault for sharing all the helpful indicators. Discretionary trading is very difficult, and as the world inevitably works more with automation, it will be leaning on indicators for EA/Robot placement. 1,000 smiles...Peace on Earth
James Ngo - Verified Purchase
Good investment
Read More
IndicatorVault has made my trading so much easier. I was recommended by a friend. Good visual of trades and easy to analyze. It's definitely a good investment.
R Rodgers - Verified Purchase
Great indicators.
Read More
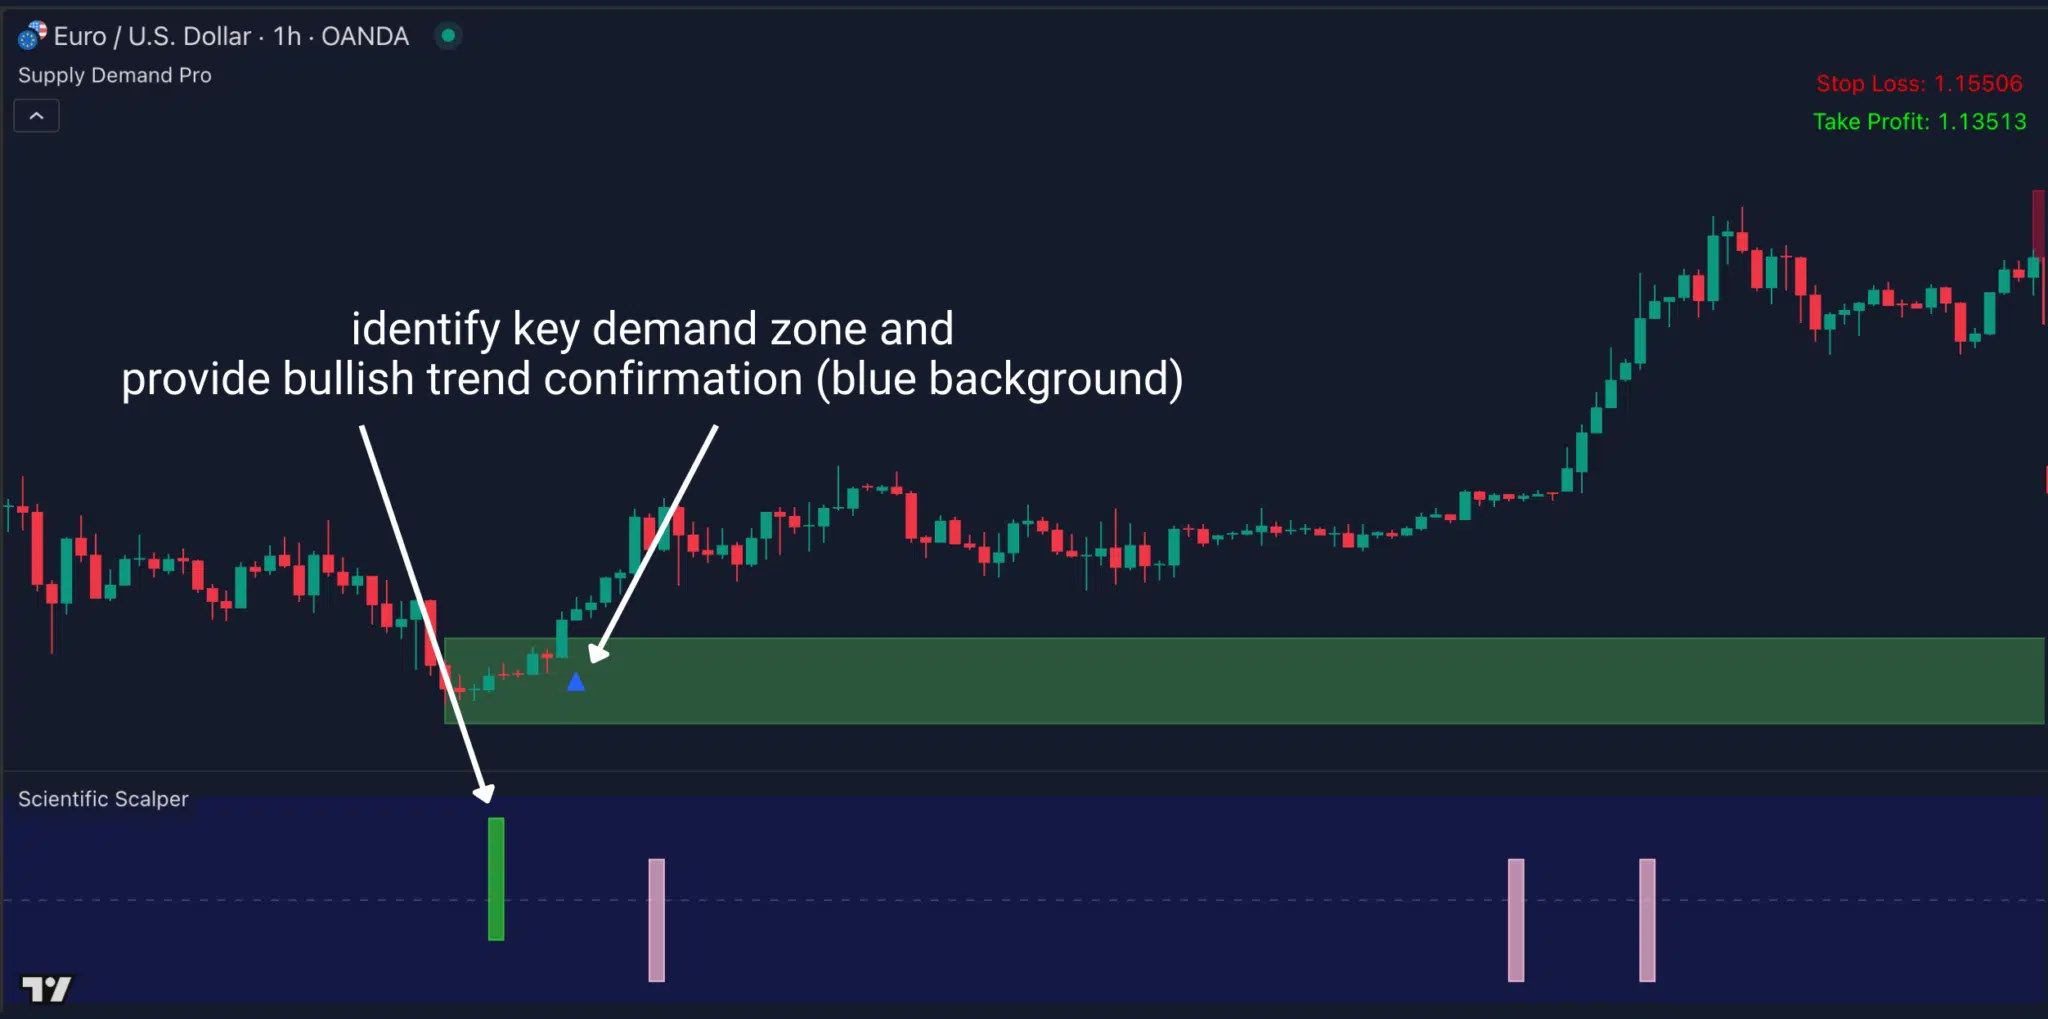
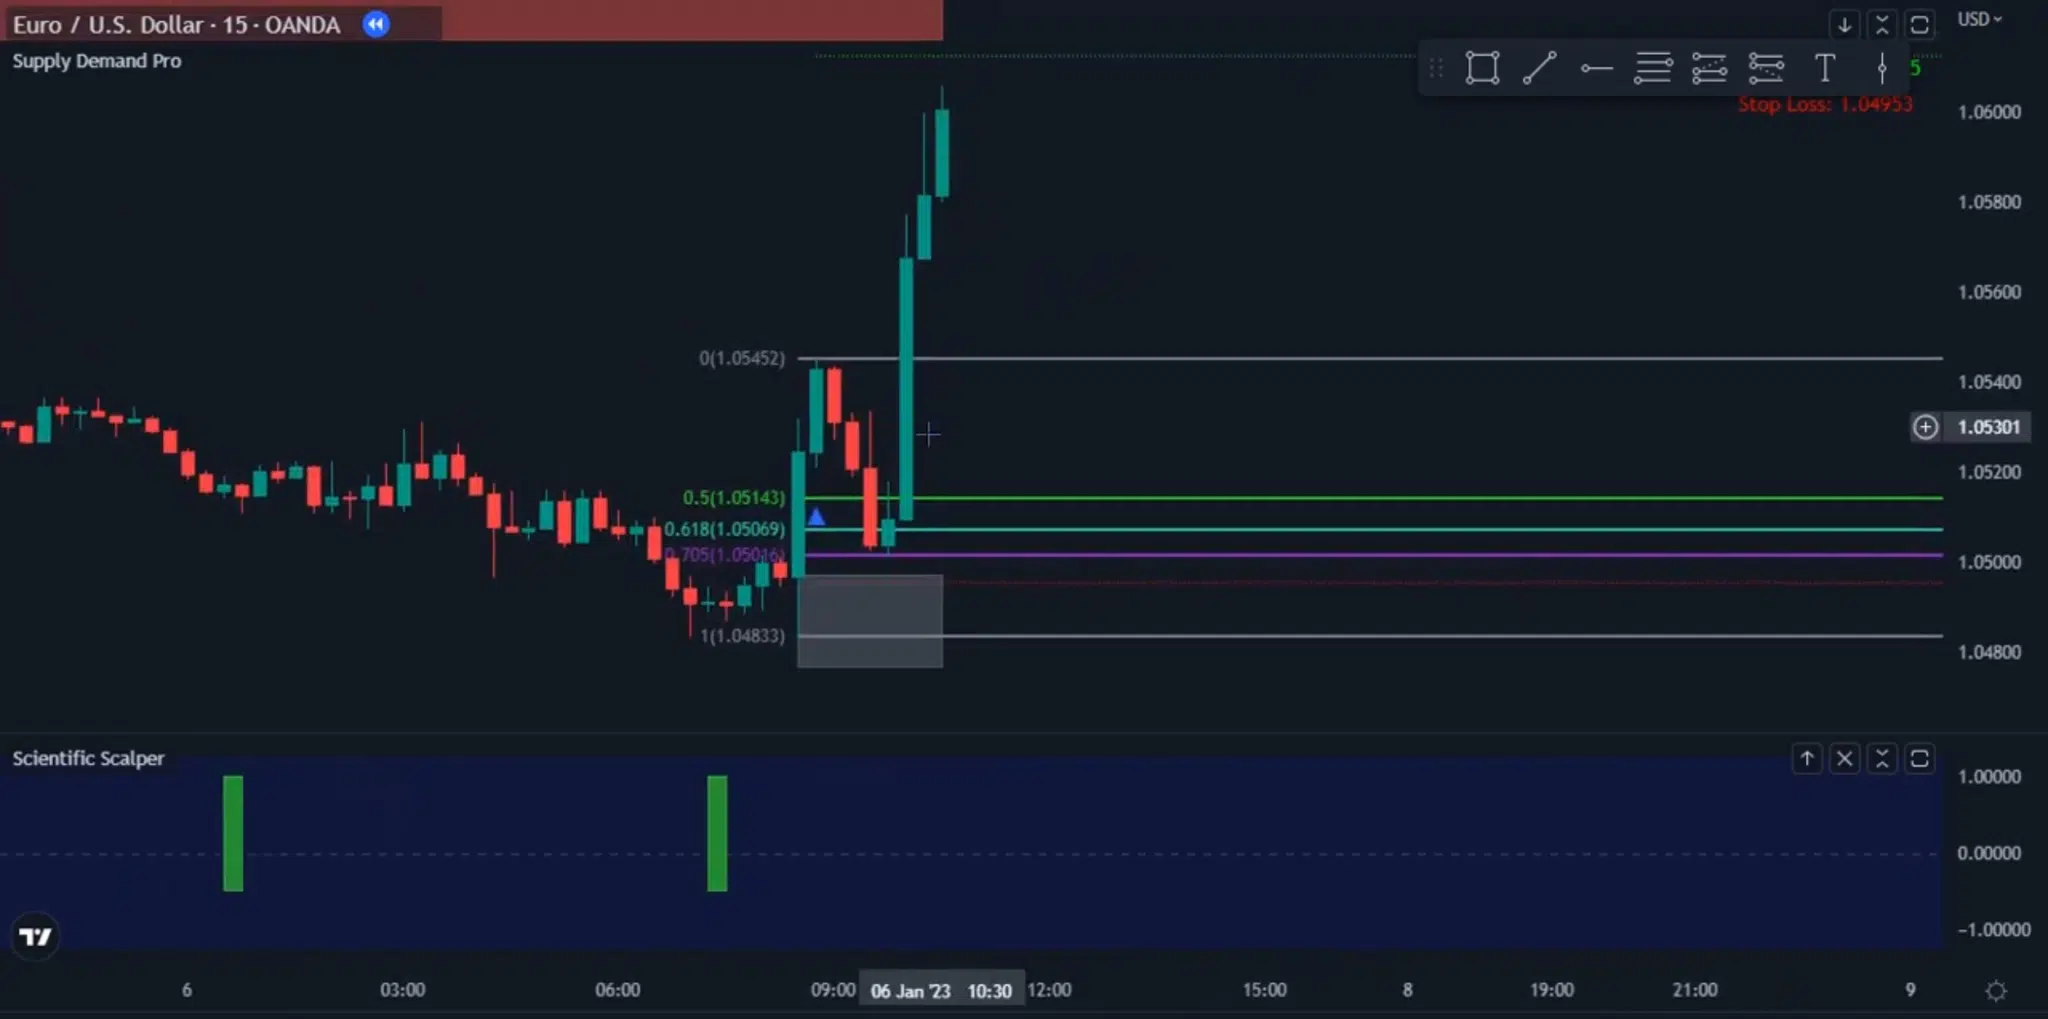
The premium collection is worth it and the best deal! Depending on your style there is an indicator for everything. And you can try them all out if you like to see which ones work with your strategy. For me, the Nadaraya Watson Estimator - based indicators are very helpful. And some of the swing indicators. Others not so much. Get as much computing power as you can afford as indicators will tax your processor especially on lower time frames and longer bar counts. And trust me, you won’t be satisfied with just one at a time! Trying each one out will help you arrive at the optimum collection for your strategy.
Terence - Verified Purchase
Fantastic results with these indicators
Read More
There's a treasure trove of indicators and each has its own usefulness. One way is try out these indicators by having a mix and match each indicators or use their recommendations of their indicators. Most importantly, is to have the patience to try it out and you'll get the results. Closest thing to an EA. Definitely recommended.
Previous
Next